

The winter season has so much to offer in the adventure department. A snow-laden landscape can be as breathtaking as it is challenging. If you’re planning to camp in the snow this winter, understanding how to pitch and secure your tent successfully is essential. Whether you’re trekking to your destination through the snow, or there’s a chance you may wake up to a snowed-in tent, this is stuff you’re going to want to know before you’re out there.
What’s Different About Winter Camping?
In harsh snowy conditions, regular stakes and equipment simply won’t hold up due to the soft nature of snow. Specialized gear and techniques are necessary to ensure you’re not going anywhere in the heightened weather conditions. That’s why being prepared by educating yourself and allowing time to practice can make a world of difference when out in the field. Keep reading to learn our tips and tricks on how to successfully pitch a winter tent in the snow!
Starting With the Tent
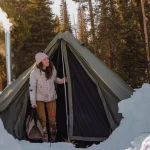
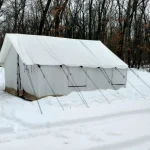
Let’s face it– your ultralight, nylon, pop-up tent is just not cutting it in a blizzard. ‘Tis the season to bring out the big guns: a 3 or 4-season cotton canvas cold weather tent. A heavy-duty cotton canvas tent is the best option, as the canvas is naturally both insulating and breathable. Canvas also offers unmatched durability and weatherproofing, unlike other synthetic tent materials. A canvas camping tent is equally luxurious and technical, providing campers peace of mind, warmth, and comfort in extreme conditions.
Prepping Your Campsite
Leveling the ground:
A comfortable tent setup has a nice, level, and smooth foundation. Typically when picking a campsite, you’re looking for the most even and sheltered ground. But because snow is so soft and often falls unevenly, this can be more difficult to find. Try locating the flattest area, and firmly packing down the snow to create your foundation. This will help prevent your tent from sinking and will provide solid ground when walking around inside. Additionally, this will also make staking slightly easier.
Utilizing a tent footprint:
If you don’t already have a canvas tarp in your regular camping gear rotation, it’s time to add one! These highly versatile items come in clutch, especially in the snow. Lay your canvas tarp on the leveled snow to act as a tent footprint. Not only does it protect your tent’s material from moisture and damage, but it also adds a layer of insulation between you and the cold ground. Canvas tarps are also super helpful as camping gear covers, protecting your items and equipment from moisture damage.
Pitching the Tent
What you’ll need:
- A tent footprint
- Snow anchors
- Guylines
- Rainfly
Once you’ve leveled out the ideal camp spot and positioned your tent footprint, it’s time to pitch your winter camping tent! Like you typically would, lay out the tent flat atop the footprint, with the main entrance facing where you desire. Then, it’s time to get the stakes and guylines out of your tool kit.
Snow stakes:
In heavy snow, snow stakes are especially useful. These are designed to act as an anchoring system when buried in the snow. Things called “dedicated snow stakes” allow snow to freeze around them, and the same effect can also be accomplished by creating “deadman anchors”. These are improvised anchors made with objects like rocks, sticks, or even skis and bags, and burying them partially in the snow. Their weight in compacted snow becomes windproof and helps your guylines stay taut throughout various conditions.
Using your snow anchors:
Once you’ve leveled the ground and set your tent footprint in place, dig shallow holes where you want to place the anchors. These should be far enough away from the tent walls to pull the guylines taut and distribute tension throughout your tent. Once you’ve placed the anchor inside, pack the snow thoroughly around it. Then attach your guylines and raise your tent as usual.
Tips for Keeping Warm Inside
Nothing is quite as cozy as thawing out by the light of a crackling wood fire. Many winter canvas tents are designed to accommodate a tent stove with the inclusion of a stove jack. This makes it safe and easy to install and use a propane or wood-burning stove for a multipurpose heating and cooking setup right inside your tent.
A canvas wood carrier helps keep firewood organized and dry– which can be a difficult task in the chillier seasons. That means a cleaner tent, and a longer, more radiant burning campfire.
In addition to a winter-grade sleeping bag, a sleeping pad or platform will make a huge difference in your quality of sleep and health during your winter camping trip. Aside from offering a level and more comfortable place to sleep, a pad or platform creates a solid distance between you and the freezing ground, making it easier to stay warm and comfy throughout the frigid nights.
Tips for Planning Ahead
Cold winter camping requires some extra preparedness. You’ll want to bulk up your camping essentials list to make sure you’re prepared for anything and everything. In the wilderness, weather conditions can change rapidly and unexpectedly, so only go if you are sure of your capabilities and preparedness. And remember to always tell someone who you trust where you are and how long you plan to be gone.
Triple-check the weather forecast and trail conditions! Knowing what kind of snow you may encounter along the way can help inform what type of stakes you need to bring among other gear. Heavier-packed snow in high winds may require dedicated stakes, versus light powder snow that may only need regular or improvised stakes.
Winter camping is truly an experience like none other. Understanding your cold-weather tent and how to set it up securely will give you that extra peace of mind so you can really focus on the activities and scenery that winter has to offer. With the right experience, preparedness, and flexible, positive attitude, you can set yourself up for an amazing time.





No Comment! Be the first one.