
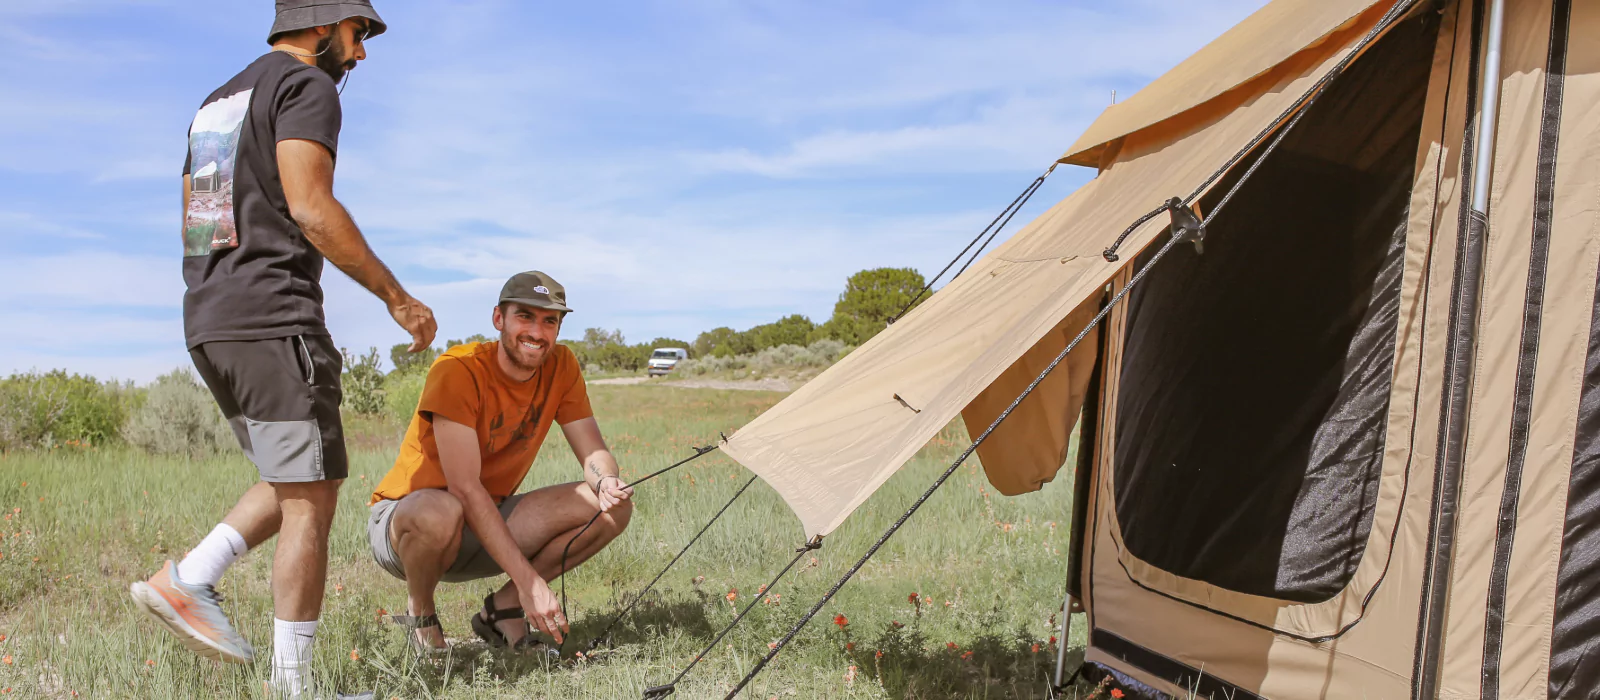
Planning a yurt tent camping trip this year? If not, you should! Yurt camping is an awesome way to experience the outdoors, giving you a comfortable and functional home base to reconnect with nature and explore the outdoors.
Table Of Contents
- What Is Yurt Tent Camping
- Everything You Need to Set Up a Yurt Tent
- How to Pitch a Yurt Tent Step-By-Step
- Find a suitable campsite
- Lay out your ground protection
- Unpack your tent and secure the floor
- Assemble the poles
- Add your rainfly sheet
- Stake and secure the guylines
- Using a Wood-Burning Stove in Your Tent
- Packing Up at the End of Your Trip
- Wrapping It Up
Yurt tents are a bit more complex than your average canvas cabin tent, due to their large sizes and distinctive shape. Like any glamping tent, you should come equipped with the proper gear and understand how to pitch your shelter to minimize stress and increase efficiency once you arrive at camp. Read on to learn how to set up a yurt tent, from unboxing and pitching to packing up at the end of your trip. Plus, discover how to safely use a wood burning stove in your yurt. Let’s dive in!
What Is Yurt Tent Camping
Simply put, a yurt tent is a variation of a glamping tent that resembles a traditional yurt structure. Like a traditional yurt, a yurt tent features an iconic circular shape and a durable fabrication, often of cotton canvas or similar material. Unlike a traditional yurt, however, a yurt tent lacks a wood frame. Instead, yurt tents get their structure from heavy-duty aluminum tent poles. Because of this, you’ll find they’re much lighter and easier to transport, without sacrificing the large space that’s ideal for glamping. In the camping world, you might find yurt tents are often called bell tents, too.
Everything You Need to Set Up a Yurt Tent
Camping in a yurt tent requires much of the same gear you’ll need on a regular camping trip. Pack everything you normally would for a week or weekend in the wilderness, plus the following essentials to pitch your yurt tent. If you’re leaning into the glamping vibe, opt for the luxurious options when it comes to your sleep setup and camp furniture. If you prefer a more rustic experience, go for the more traditional gear.
- Yurt/bell tent
- Tent stakes
- Rainfly sheet
- Ground tarp
- Mallet
- Pocket knife or multi-tool
- Headlamp and flashlights
- Navigational tools
- Sleeping bags with liners or bed linens
- Sleeping pads, foldable cots, or air mattresses
- Pillows and extra blankets
- Battery-powered fans and heaters
- Interior lighting like lanterns and string lights
- Camping chairs
- Foldable table with tablecloth
- Firewood, firestarter, and lighter
- Tent awning (optional but nice to have)
- Tent stove (optional but nice to have)
- Campsite decor (optional but nice to have)
How to Pitch a Yurt Tent Step-By-Step
With your gear in hand, it’s time to set up your tent! Grab a friend and follow this step-by-step guide.
Find a suitable campsite
No matter what kind of tent you’re pitching, it’s always important to find a good campsite for the sake of your comfort and safety. Yurt tents tend to be on the larger side, so be sure to find a site that can comfortably fit your tent and the rest of your campsite gear. Aside from size, look for a spot with level ground that’s free of any major lumps, bumps, and large rocks. Before pitching your tent, take time to clear any debris from the ground that could puncture your tent or make for an uncomfortable night’s rest. Lastly, look up! Be aware of dead trees and falling branches and avoid setting up camp under them.
Lay out your ground protection
Once your site is picked out and cleaned up, you’ll want to lay out your ground tarp to protect the bottom of your tent. Your tarp should match the size and shape of the bottom of your tent. Any larger and you risk water collecting underneath, getting your gear wet, and increasing your chances of moisture-related wear and tear.
Unpack your tent and secure the floor
Unpack and lay out your tent on top of the ground tarp. Position it so that the tent door is in a good spot for easy entering and exiting and that it’s facing a direction you’re happy with. Make sure your tent edges align with your ground tarp and that you’ve flattened out any folds. Before moving on to the next step, grab your mallet and stakes and secure the bottom of your tent and the ground sheet around the edges. This will ensure they stay in place while you get your tent off the ground.
Assemble the poles
Next, use the center pole to open the tent and step inside (be sure to take your shoes off for this step!). Insert the pole in the center of the tent to raise the roof. Once secure, assemble the A-frame poles at the entrance. Depending on the model and brand of your yurt tent, there should be designated pockets or straps where the poles should live.
Add your rainfly sheet
With your tent erected, it’s time to add your rainfly sheet to protect against precipitation. Even if there’s no rain in the forecast, weather can change rapidly, especially in the mountains. The last thing you want is to start scrambling to get a rainfly up when unexpected rain starts coming down. Do yourself a favor and set it up just in case!
At this point, if you have any extra gear you want to add, like an awning or porch extension, now’s the time to assemble and secure those.
Stake and secure the guylines
Guylines are an important feature that helps minimize leakage from rain and adds structural stability to your tent, especially in windy, rainy, and snowy conditions. Hammer your guy lines approximately 3 feet away from your tent and adjust the tension as necessary. There should be ample space between your rainfly and your tent body so that precipitation falls away from your tent.
Using a Wood-Burning Stove in Your Tent
While they’re not necessary for a great yurt tent setup, wood-burning stoves are an awesome addition to glamping. They add much-needed warmth to your tent when camping in the late fall, early spring, and winter months. They also make preparing meals more convenient, giving you a warm space inside your tent to cook. Plus, they add unmatched ambiance for glampers looking for a cozy retreat any time of year.
If you want to use a wood burning stove safely, you’ll need a yurt tent with a stove jack. Stove jacks provide a safe exit point for the smoke and fumes a stove will produce. Some canvas tents already come with a pre-installed stove jack, or you may want to add one yourself.
Packing Up at the End of Your Trip
When it comes time to pack up at the end of your trip, you’ll want to pay special attention to your tent to ensure it stays in good condition while not in use. Yurt tents are high-quality, long-term investments that require maintenance for longevity.
Before folding it up and packing it away, set time aside to clean out any debris that might have made its way inside. If necessary, spot-clean your tent. If there’s any moisture leftover from cleaning, morning dew, or precipitation, leave your tent out to dry before storing it to avoid mold and mildew buildup. Once cleaned and dried out, go around and remove all the stakes, wrap up your guylines, take down the poles, and fold them up to fit in their storage bag. Be sure to fold your tent in different directions after every use to avoid wear and tear folding over the same lines over time. As for storage, find a cool, dry place to further prevent mold and mildew growth that could compromise the integrity of your tent.
Wrapping It Up
Yurt tents are a unique shelter, offering the robust comforts of glamping while immersing campers in the great outdoors. While they’re an awesome shelter for a plethora of reasons, they’re also a bit more complex than traditional camping tents when it comes down to setup and take down. Packing the right gear and selecting the right campsite will follow the same general guidelines as any other camping trip, and are important first steps. When it comes time to pitch, follow this guide to make the most of your tent and set yourself up for a successful trip. So gather your gear, practice pitching your tent, and head into the wilderness with confidence, knowing you’re ready to enjoy the rustic luxury of yurt tent camping.





No Comment! Be the first one.