
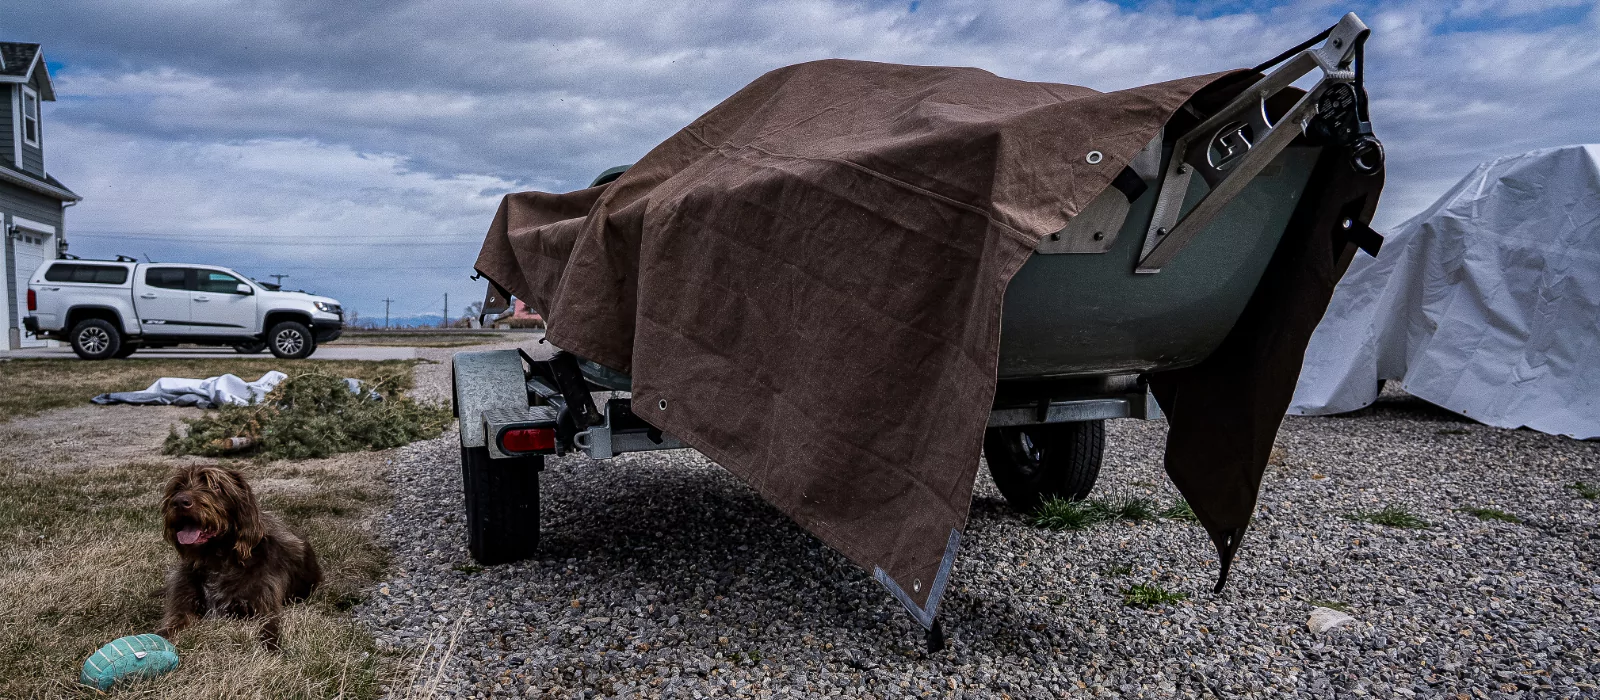
When preparing for a trek into the woods, proper planning and careful consideration are key to ensuring a successful and enjoyable experience. One of the most versatile and essential pieces of gear you simply can’t leave on a camping trip without is an outdoor tarp. Durable, easy to transport, and compact to store, tarps offer a myriad of uses from shelter to ground cover. We’ll take a brief dive into some innovative tarp hacks that can elevate your outdoor adventures, providing practical solutions for utmost protection and versatility.
Table Of Contents
- Understanding Tarps
- Common Uses of Tarps
- Ways to Maximize Use of Tarps for Outdoor Protection
- Use Your Tarp As A Ground Cloth
- Use Your Tarp as a Rain Fly
- Use Your Tarp as a Windbreak for Your Outdoor Kitchen Area
- Emergency First Aid Station
- Tarp As a Privacy Screen
- Use Your Tarp As A Hammock
- Tarps as a Drying Rack for Gear
- Use Your Tarp for Cooking Protection– Even If It Isn’t Windy
- Use Your Tarp for Gear Storage
- Other Ways to Use Tarps, and Tips For Doing So
- Wrapping Up…
Understanding Tarps
Before we break into some of our best tarp hacks, let’s first explore what tarps even are, and the basic features they include. “Tarp” is short for tarpaulin, and is simply a large sheet made from durable materials like polyethylene, canvas, and nylon. They are waterproof barriers, tear-resistant, and often feature grommets (metal-rimmed eyelets) along the edges for easy staking and attachment. A canvas tarp is typically great for use as a quick sleeping shelter or cooking shelter, while a plastic tarp works well as a groundcover to protect sleeping quarters from seeping moisture, and is also effective for dry gear storage.
Common Uses of Tarps
- Shelter: Tarps are often hung in trees or attached to a few poles in order to create a makeshift shelter that effectively protects against rain, scorching sun, and wind.
- Ground Cover: A ground cover tarp serves as a barrier between you and (obviously) the ground, keeping you clean, dry, and–when laid as the foundation of camp–protecting your tent’s foundation from wear and tear.
- Gear Protection: Shields equipment such as tents, cookware, grills, lawn mowers, boats, trailers, and more from rain, mud, and debris.
- Cleanliness: Tarps can provide a clean, distinct area perfect for preparing meals outdoors.
- Privacy Screen: Tarps are great for creating a secluded area for changing clothes or resting.
Ways to Maximize Use of Tarps for Outdoor Protection
Create a Quick, Effective ShelterOne of the most common uses for a tarp is to create an instant shelter. Whether you need protection from rain or sun, a tarp can be set up quickly using the following method:
Materials You Will Need:- A tarp, obviously. Choose your size depending on how many people will need to hunker down under your shelter, as well as the amount of gear present.
- You will need rope or paracord to hoist your tarp overhead and secure it in place.
- Tent stakes or heavy rocks can help hold down the edges of your tarp.
- Choose a flat, dry area as your shelter location free from debris and falling branches.
- Spread your tarp flat on the ground, ensuring that it is properly oriented toward the direction of the wind.
- Use your rope to tie down the top two corners of your tarp, securing them to nearby trees or poles, and creating a sloped roof. This will allow water to run off rather than pooling and weighing your shelter down.
- Place your tent stakes or heavy rocks on the bottom corners of the tarp shelter to secure it to the ground.
Use Your Tarp As A Ground Cloth
Using a tarp as a ground cloth keeps both your tent and sleeping area clean and dry. Here are a few tips to help you make the most of your ground cloth and secure it effectively to protect against water and debris.
Steps:- Select an Appropriately Sized Tarp: Choosing the right size tarp seems like a given, but for best results, don’t just fit your tarp to the same size as your tent. Be sure that you choose a tarp that is larger than the base of your tent in order to ensure complete coverage and ample protection.
- Let Your Tarp Be the Foundation: Set up your tarp first, laying it on the ground before pitching your tent. This helps keep the floor of your tent clean, protected from moisture, and padded from rocks and roots on the ground.
- Adjust Your Tent To Account For Wind: If it is a particularly windy day, stake down the corners of the tarp to prevent it from collapsing or blowing away in the face of a strong gust.
Use Your Tarp as a Rain Fly
No need to make an extra purchase– a versatile tarp can also serve as a DIY rain fly to protect your tent and camping area from unexpected showers.
How-To:- Choose the Right Setup: Select a central point, such as a tall, strong tree in the middle of your campsite from which to hang the tarp.
- Create a Lean-To: Hang the tarp from the tree at a sloping angle, securing the higher end with a rope– you’ll want to tie it to the trunk of the tree or a sturdy branch.
- Stake the Edges: Secure your tarp shelter’s lowest edges with tent stakes or heavy rocks to ensure that the tarp can prevent rainwater from pooling.
Use Your Tarp as a Windbreak for Your Outdoor Kitchen Area
When cooking outdoors, wind is not only a real annoyance but can also be dangerous. Use your tarp to create an effective windbreak for a more pleasant and efficient cooking experience– and avoid flying sparks or grease.
Here’s How:- Select Your Location: Position your cooking area and all of your equipment facing away from the wind.
- Set Up the Tarp: Erect the tarp on the side of your cooking area which faces the wind to serve as a strong and efficient barrier.
- Secure the Edges: Once again, grab your stakes and push them through your tarp grommets to hold the low side in place, making sure your shelter is tall enough that you can move around comfortably but low enough to actually block the wind.
Emergency First Aid Station
You can also use your tarp as a makeshift first aid station, providing ample shelter against wind, rain, and harsh sun. Having a designated first aid station helps to encourage cleanliness and organization.
Steps:- Designate an Area: Choose a flat space to set up your emergency first aid station, one that is centrally located and easily accessible.
- Hang the Tarp: Create a covered shelter by hanging the tarp between two strong trees or tall poles.
- Organize Your Supplies: Use the covered space to safely store first aid supplies, keeping them dry, clean, and ready for use when they are needed.
Tarp As a Privacy Screen
When camping in crowded areas, privacy is essential to comfort and true enjoyment for all. If you find yourself in a particularly cramped campground, a tarp can serve as a simple and effective privacy screen.
Tips:
- Identify Your Spot: Choose the spot that most needs screening, e.g., private places like a bathroom area or the area around your tent setup.
- Hang the Tarp Vertically: Use your rope to tie the tarp between two trees or poles in a vertical position to create an effective privacy barrier.
- Be Sure Your Tarp is Well Secured: Ensure that your tarp is firmly anchored to the ground with stakes or heavy objects like rocks to keep it from blowing up or away and defeating the purpose of a privacy screen altogether.
Use Your Tarp As A Hammock
If you do not own a hammock (or forgot to throw it in with your gear) but wish for a relaxing place to lounge amongst the trees, you can create a DIY hammock with a tarp! All you’ll need is a tarp of your choice and some rope.
Here’s How:- Choose Your Location: Locate two sturdy trees a reasonable width apart. You can eyeball this, you’ll know when you see the right hammock trees. Trust.
- Fold Your Tarp: Fold the tarp in half longways to create a more cozy, cushiony, snug surface.
- Secure It To The Support: Use two pieces of rope to tie both ends of the tarp to the trees, firmly looping it around the ends of your tarp itself to prevent slippage. Make sure it’s pulled taut and is safe enough to sit or lie down on.
Tarps as a Drying Rack for Gear
Tarps can also serve as effective drying racks for wet gear, helping you keep your equipment in like-new condition for many seasons to come.
How-To:- Hang the Tarp: Hang your tarp between two trees or poles to create a flat surface for your gear to rest.
- Spread Out Your Wet Gear: Lay out your gear with plenty of space between each item on the flat surface of your tarp. Ample space provided by a large tarp surface provides for maximum air exposure.
- Secure Items: If it’s windy out, you might want to use a few rocks or additional stakes to weigh down your lighter pieces of gear to keep any of your belongings from blowing off of the tarp.
Use Your Tarp for Cooking Protection– Even If It Isn’t Windy
When cooking outdoors, a tarp can be useful for protecting your food and utensils from rain, moisture, or falling debris like sticks and bugs. We touched on the usefulness of tarps for cooking when it’s windy, but honestly, it’s not a bad idea to just create a cooking shelter for yourself regardless of the weather.
Tips:- Erect the tarp directly above the area in which you plan to cook, using poles or trees for support.
- Be sure to leave plenty of space for all of your necessary cooking equipment, an area for preparing the food, and room for moving about.
- Ventilation: Allow for a bit of healthy airflow to prevent smoke from building up while cooking. You’ll be glad you did!
Use Your Tarp for Gear Storage
Tarps can also be useful for creating temporary storage solutions for your camping and outdoor gear. They’re helpful organizational tools as well as protective barriers against moisture, pests, and harmful UV rays.
Tips:- Lay Your Tarp Completely Flat: Spread your tarp on the ground, fully extended with edges smoothed.
- Arrange Your Gear: Place your bags, items, and equipment in the center of the tarp, taking care to arrange them in a way that makes spatial sense and keeps all items from being crushed.
- Wrap Everything Carefully: Gather all four corners of your tarp, tying them together to create a makeshift bag and protect your gear from damaging moisture and dirt.
Other Ways to Use Tarps, and Tips For Doing So:
Always be sure you have chosen the right tarp material for the intended use. Depending on situational needs, choose a tarp made from appropriate materials. Canvas is best for long-term durability, but polyethylene or plastic does the trick for short-term, lightweight, moisture-wicking use.
Never carry a tarp without carrying a rope, too! Keep a length of rope or paracord with your tarp at all times, as it is absolutely necessary to have rope for tying down a tarp in most configurations and for most usage purposes.
Practice setting your tarp up in various ways. Before setting off on your trip, experiment with your tarp and practice using it in several different ways in order to become familiar with the handling process. This will save you so much time and reduce unnecessary frustration in the field.
Be mindful of your environment. When using tarps, especially ones that are a bit more dense and awkward to maneuver, try your hardest to avoid damaging plants and wildlife. Always follow Leave No Trace principles.
Wrapping Up…
Tarps are arguably THE must-have for any outdoor enthusiast. If you have a tarp, you are covered (no pun intended) when it comes to shelter, warmth, relaxation, and organization. From creating a lean-to shelter or windbreak to serving as a makeshift outdoor kitchen and gear storage area, the immense versatility of tarps is unmatched and makes them a priceless tool to have on any adventure. By incorporating some of our favorite tarp hacks into your next camping or hunting trip, you can count on increased comfort and convenience. Embrace simplicity, and make your tarp a gear staple from here on out. Happy camping!





No Comment! Be the first one.