
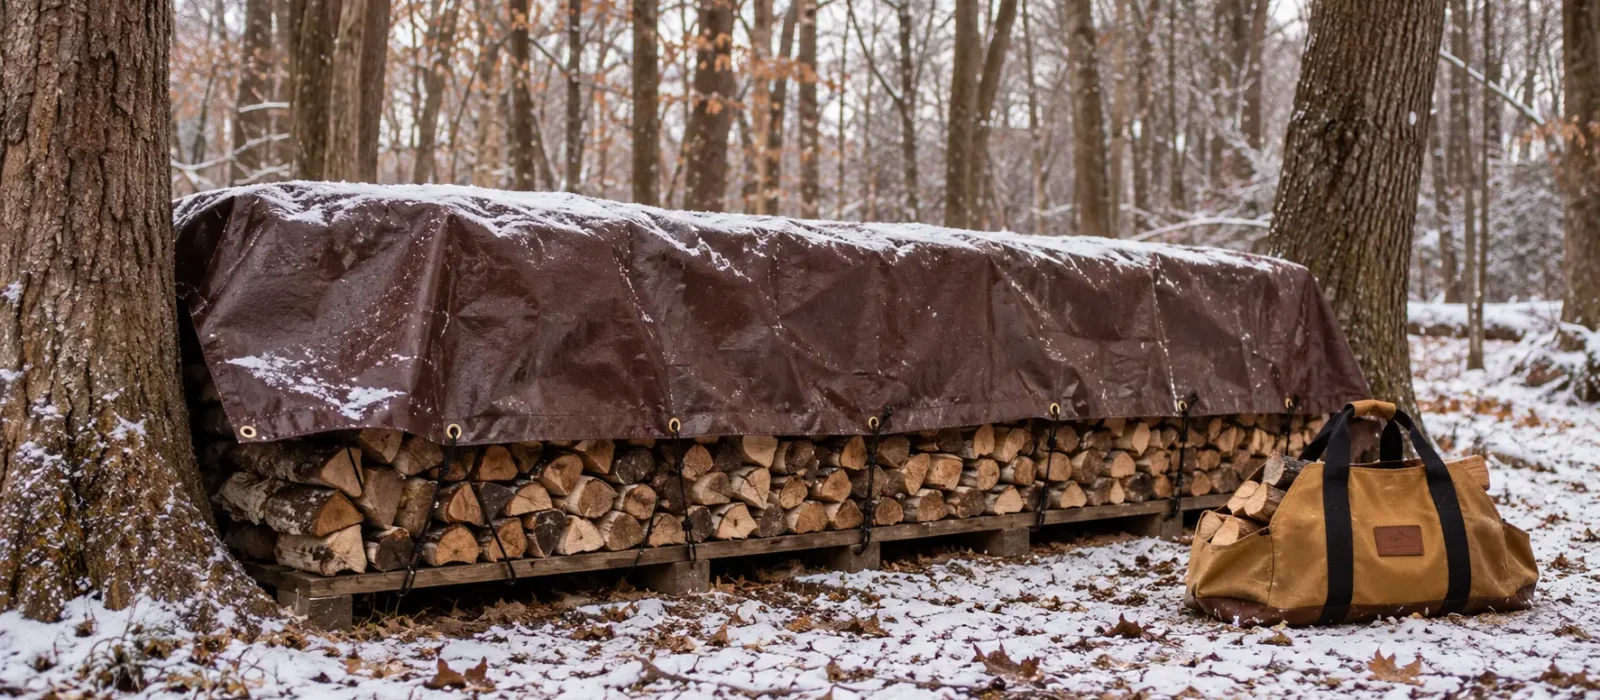
Wet firewood is not so much firewood as it is expensive kindling that smokes, smolders, adds creosote to your chimney, and delivers a fraction of the heat that properly dried wood does. Protecting a full firewood stack through a long, wet winter of rain, snow, and freeze/thaw cycles isn’t complicated, but most people just throw a tarp over everything and walk away, creating as many problems as it solves.
Table Of Contents
A poly tarp for a firewood pile is the right tool for the job when used correctly. As in many things with camping and building fires, the approach determines the outcome. This blog will cover how to stack before covering, how to position and secure the tarp so it protects your woodpile without trapping moisture, and the specific mistakes that can turn a woodpile into a mold pile in the middle of winter.
The Cardinal Rule: Cover the Top, Leave the Sides Open
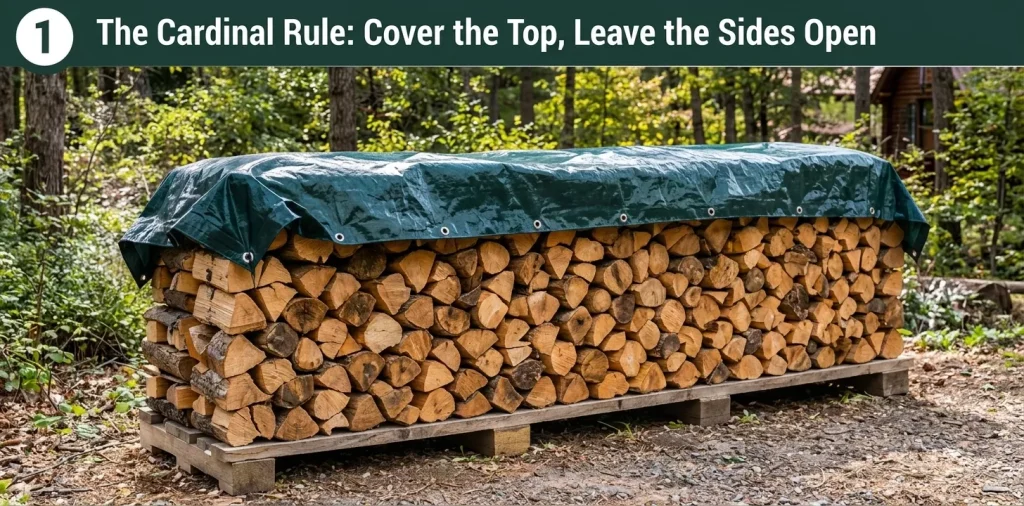
Every piece of research suggests the same thing about firewood storage: cover the top of the stack, leave the sides completely uncovered. This is the single most important principle for protecting your firewood through the winter, and, it would seem, it is the step that most people storing wood at their homes get wrong.
The simple reason is airflow. Firewood dries out through the consistent movement of air across the cut ends. Moisture evaporates outward from the exposed face of each piece of split wood. When a tarp wraps the entire stack, that moisture has nowhere to go. It sits against the wood, and the tarp creates a sealed humid environment. Consider the dry wood you find in the wild. It is nearly fully exposed to the elements and will burn the best. The scavenged wood that you find in the forest that is half buried in the ground and covered with leaves comes out damp, sometimes moldy, and is extremely resistant to burning. This same principle works with the tarp at home.
Top coverage also matters because rain and snow falling directly on the pile saturates the top layer and works its way down. A poly tarp that extends several inches past the top edges of the stack will block most of that moisture at the surface and redirect it toward the ground. The sides remain exposed to the wind and breeze, and even the rain in severe weather, but that exposure is preferable to the trapped moisture that happens with a fully-covered pile. The open side will allow the wood to dry after the nasty storms.
What to Look for in a Winter Firewood Tarp
Not all tarps are built equally. Because of that, not all tarps are going to perform well in a long season with sustained outdoor exposure. The material, weight, and UV resistance determine whether the tarp is still a working piece of equipment when March rolls around. In many cases, after that long period of rough weather, it’s time for the tarp to go with the spring cleanup load to the dump.
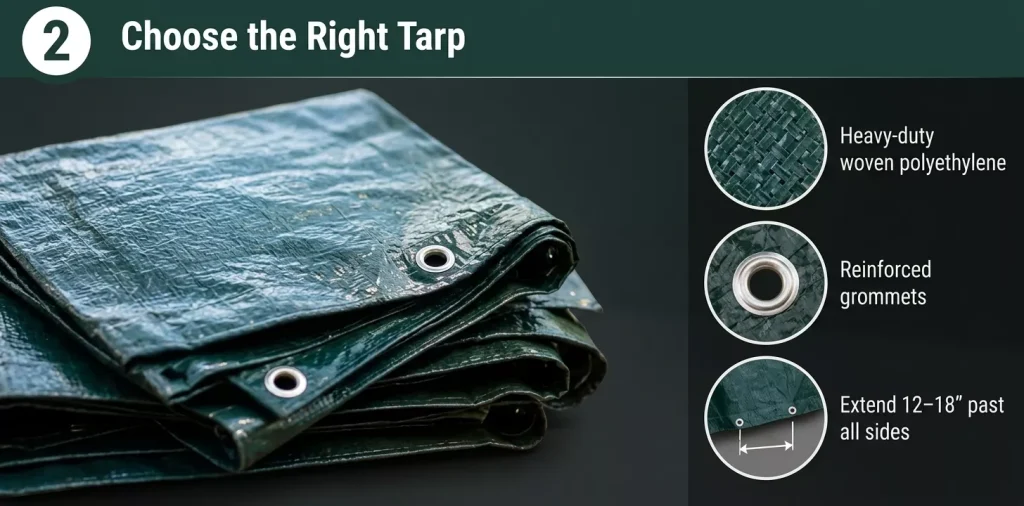
A heavy-duty poly tarp made from woven polyethylene is the right choice for a winter firewood storage tarp. Polyethylene is waterproof, resists UV degradation, and handles the weight of deep snow without ripping or fraying. Cheap, thin-film tarps that run only a few dollars at the hardware store are not built for long, rugged exposure. They shred at the grommets, tear on fold lines, and fail within a season. The price is lower, but losing a whole cord of firewood to a shoddy tarp is not worth the minimal savings. A quality poly tarp, such as those designed and fashioned by White Duck, built from heavy-gauge woven poly, costs more upfront, but will save you several winters’ worth of wood in the long run.
Size matters more than most folks account for. When they hear the pile must be covered on the top with sides exposed, they tend to forget the moisture drippage from the top. The tarp needs to extend past the edges on all four sides of the stack by at least 12 to 18 inches. This creates the overlap that allows the water to shed from the top and away from the base of the pile. Measure the footprint of the fully stacked pile and add at least two feet to both dimensions in order to choose your tarp size. A tarp that barely covers the corners can redirect water right back into the wood pile, which is distinctly what we are trying to avoid.
Grommet quality should also not be ignored. The quality of those rings determines how well the tarp stays secured through strong winds. Reinforced grommets hold stakes and bungee cords with ease and will not fail under tension. Punched-hole grommets without reinforcement tear out in the first serious wind and will leave your woodpile exposed for the duration of the storm.
How to Stack Before You Cover
The stack will determine how well the tarp performs; it is a symbiotic relationship. A poorly stacked pile creates low points where water pools on the tarp’s surface instead of running off. Also, direct ground contact undermines the top coverage entirely.
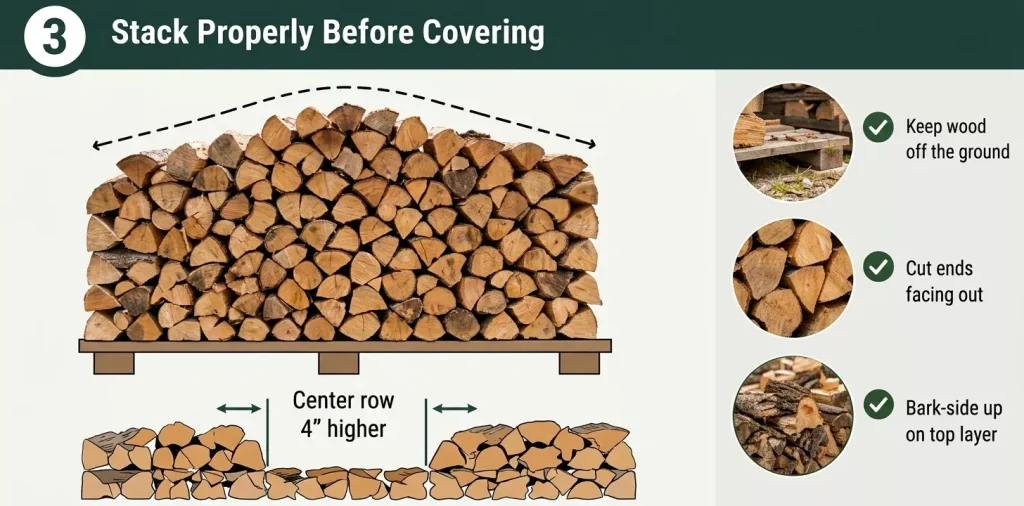
Get the stack off the ground. Even four inches of clearance between the bottom layer of wood and the soil makes a huge difference. Ground moisture wicks upward through direct contact, meaning the bottom layers of wood are just absorbing all the moisture in the ground. A wooden pallet, a commercial firewood rack, or two parallel landscape timbers running the length of the stack will all provide the necessary clearance. Don’t invest too much in this layer; there just needs to be enough space to get air moving under there, the same way the sides allow for air to move through the stack.
Stack the cut ends facing out, not facing up or down. The cut end is where the moisture exits. If there are logs that are unsplit in the pile and you place them vertically in the stack, the moisture will remain inside the log without the ability of the ends to breathe and dry out. Place as much of the exposed side of the split logs toward the outside of the stack as well.
As the stack gets higher, make sure the center row is at least four inches higher than the outer rows. This ensures water drains to the edges of the pile and doesn’t pool in the center. When you are removing wood and placing wood back into the pile before and after piles, make this a rule that you stick by each time you remove and replace wood. This is the one practice that will consistently save your woodpile, and the one slip-up that can cost you the stack.
Place the top layer with the bark-side up. The bark is the wood’s natural moisture barrier, and that doesn’t change now that the tree has been made a log. This will be the first line of defense for the moisture coming down from above.
How to Secure the Tarp So It Lasts All Winter
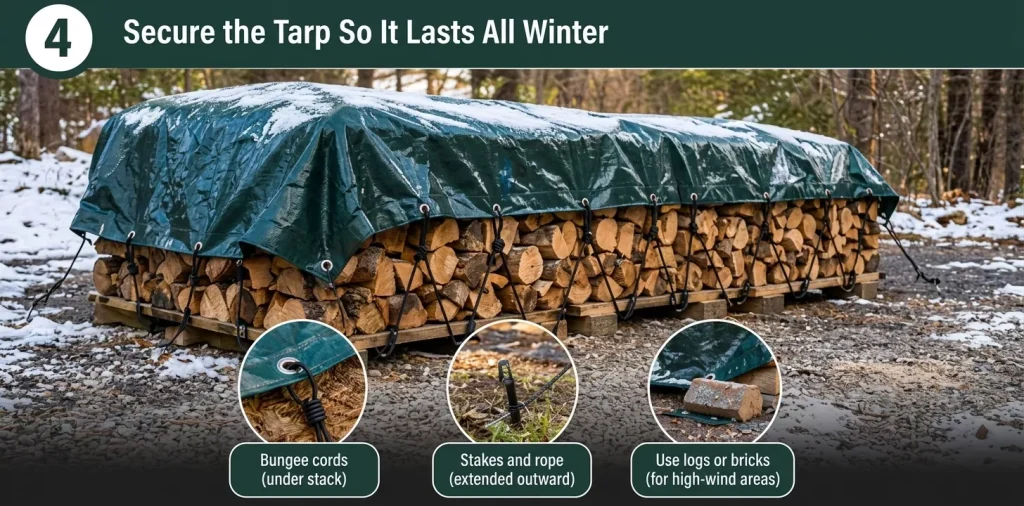
A tarp that is carelessly thrown over the woodpile and roped down without proper attention is not going to last through the first storm, let alone a tough winter. Securing a winter firewood storage tarp is not complicated, but it requires more than just draping a tarp loosely over the top and hoping for the best.
Bungee cords running from the reinforced grommets of your poly tarp and under the stack are the fastest and most common method. They keep the tarp pulled down around the edges and under tension without requiring stakes or rope. Make sure you use cords that are long enough to reach under a secure point of the stack rather than just looping around or hooking to the bottom layer. That is not a secure location, and it will inevitably come loose.
Stakes and rope at the sides of the tarp, extended outward, away from the stacked wood like a tent’s rain fly, will make sure the entire wood pile stays dry, and there is plenty of airflow for the wood, even in the wettest conditions. This is a great method, but there are costs and benefits to it. This is going to be more time-consuming and more difficult to perform in the middle of a storm. If you are gathering wood in the midst of a winter storm, unstaking and then staking a tarp repeatedly can be inconvenient. In this case, you’ll want to consider a canvas log carrier to move larger stacks of wood from the pile to the fireplace.
For a large stack in a high-wind location, such as a home at the mouth of a canyon, some extra anchoring with spare logs or bricks placed on the tarp overhang at the base will keep the edges from blowing up in gusts of wind. A tarp that is constantly flapping in the wind will shred at the grommets and fold lines over a full winter.
Moving Wood From the Stack to the Fire
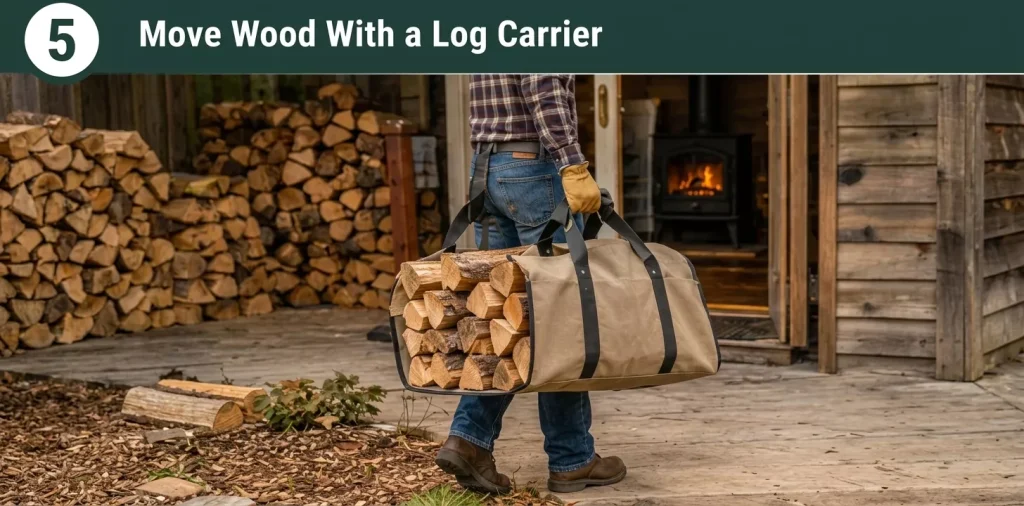
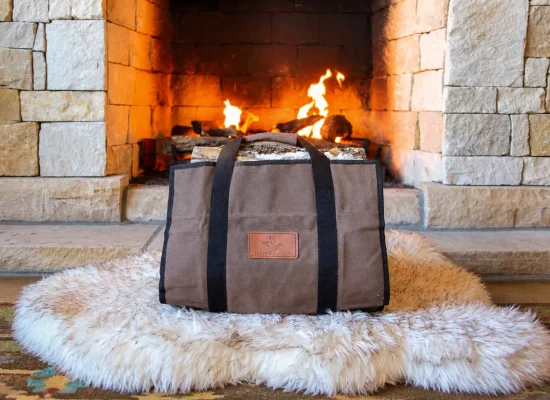
As mentioned above, there are some methods you can use to make your wood-moving practices more efficient. Getting that wood from the stack to the fireplace without leaving a trail of debris will result in a drastic increase in fire quality. A canvas log carrier handles all the wood you’ll need in one trip. Load the stack, carry it inside, and everything that would have been dropped and shed across the floor stays contained in the canvas until it reaches the hearth.
The poly tarp keeps the wood dry. The log carrier keeps the house clean. Together they close the loop on a firewood system that will work from October to the last fire of the season in March.
Dry Wood in March
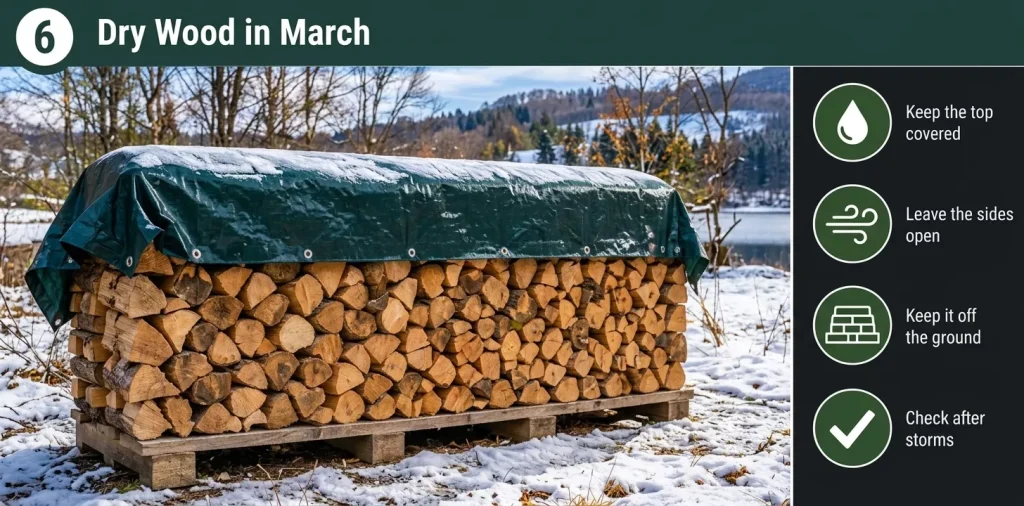
A full firewood stack properly covered in October will still be dry in March. The poly tarp is the roof, not the walls. Remember that. Allow the sides to breathe and make sure the top sheds water. Keep the wood off the dirt ground and provide the clearance it needs, and check the tarp after wind and wet storms and keep it adjusted before the next storm comes through.
None of this is labor-intensive. It just requires attention to a few minor rules that are applied consistently, and the result is firewood that lights on the first match and burns clean, without smoke, the way it is supposed to, for the entire winter.



No Comment! Be the first one.