


Wall tents may look like a simple cubic design in the age-old beige shade of canvas, but they pack the most utility. They can be proofed for harsh weather conditions, and they have adequate space for occupants to move around in.
Table Of Contents
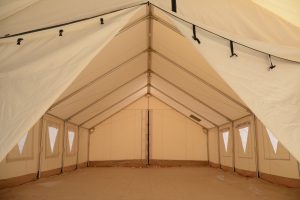
Most people forego a heavy-duty canvas tent because the idea of setting it up feels daunting. Wall tents take up to 30 minutes to set up if you do it with a friend. With more helping hands involved, it takes even less time. While you will need to carry the kit in a separate bag, and the massive canvas tends to be heavy, the setup process is fairly simple.
1- Check Your Canvas Tent Kit
As a first-time wall tent user, you must check your kit for the essentials. Having a checklist of all the items also helps you pack the day before the trip so you know you are not forgetting anything that could topple your tent, and hence your entire camping trip.
The basics include the canvas for the tent. This will be folded with velcro or buckles meeting at the seams so you can tighten it into shape.
There should be guylines, which are cords that run along the elongated side of your tent and keep your tent secured to the ground. There should also be an angle kit, which are the parts that will secure the poles of your tent.
Your tent may also include a fly cover or a tarp. A fly cover would mean there should be additional guylines for securing the extra layer on top of your roof as a barrier for rainfall and snow. A floor tarp is for adding a layer on the ground, which is not a necessity for canvas wall tents.
If you are using a second-hand tent, make sure you check the canvas for rips and tears. White duck tears are repairable DIY, so it would be helpful to spot and mend them before you head out for the trip. You should also check whether any of the parts are damaged or missing. The kit will have a list of quantities for each part. This label or card is important as it varies between the sizes of tents.
It is not that difficult to replace damaged poles. Wall tent poles are made of aluminum, but can also be fashioned out of wood. Instead of buying a new kit just get the measurements and prep new poles at home.
2- Set Up the Frame
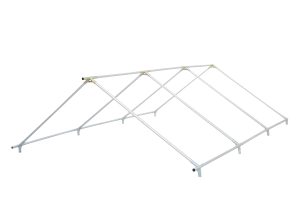
You will need the 3-way and the 4-way angle kits and the middle ridge poles. Once all of them are secured in place, you can move on to the roof frame. You will need the 3-way angles for this. Once your roof is complete, it is time to put it together.
The side, roof, and middle ridge poles must align. The steel wire can be used on the front of the wall tent, keeping it together without a steel rod.
3- Attach the Footpoles
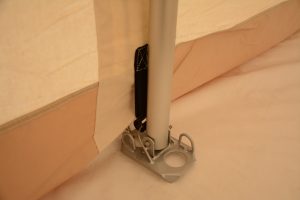
Footpoles are tiny cups with a flat base attached to them. Place these on the ground and then lift the ridge poles to place them on top of the footpoles. A quality canvas tent kit will have parts color-coded to make things easier for you. If you have a color-coded kit as well, you will want the color of the angle kit to match the pole button.
Only set the wall poles on one side, for now. We will get to the other side when the bulky canvas is set up.
4- Place The Canvas
At this point, your tent will be up on one side and leaning down on the other. Open up your canvas and set it on the ground next to the frame. Make sure you have the front door flap where you want your tent to face. Once you have the orientation right, pull the canvas over the frame. When you pull it down on the sides, you will notice that it fits perfectly to the shape of the frame, with all corners lining up. If you find that you have to pull hard on the canvas, this means you didn’t loosen the sides or didn’t unzip the door flap.
5- Stake And Tether
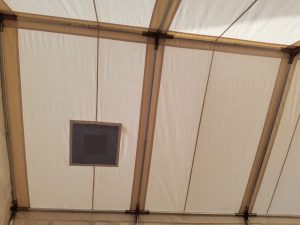
You are ready to start staking the tent. You will be able to see loops at the top of the tent walls that allow for guylines to be tethered. To place stakes around the tent, you should give the space of at least five feet between the canvas walls and the stake. Attach the guylines in each one, and adjust for how tight you would like them to be.

6- Set Up the Stove
A portable camping stove needs to be assembled as well. It wouldn’t be that complicated, you just have to attach the legs at the base of the stove and the exhaust at the top. Once you have put it together, some people like to start it up so that they have a headstart on the heating. It also helps with the smell of a freshly treated new canvas.
The stove has to be placed on the ground near the stove jack built into the canvas of the tent. This will either be on the roof with a flap covering it, or on the side of the tent in one of the walls. Keeping the tent design in mind, you should pick a stove accordingly. You must attach the chimney to the jack before you use it.
7- Clean the Inside of the Tent
By dragging the canvas tent on the ground, it will have caught mud and dirt. When the tent is finally taught, use a rag cloth or a towel to clean the inside of the tent.
And there you have it; your wall tent is ready to occupy.
Why Wall Tents Are the Ultimate Choice
Spacious
The best thing about a wall tent is that it has ample floor space to move around in, and also enough headspace so you don’t have to crouch inside your tent. One can move in their bed, a couch, and a desk inside a wall tent. This is one of the reasons why it is such a popular choice amongst glampers.
If you are interested in wall tents for hunting, you will find that not only can you accommodate yourself inside the tent, but also store your hunting gear.
Durable
Wall tents last for years. Even with frequent use, you can stretch them to around 30 years. The thick canvas and the sturdy frame are difficult to inflict damage to. Even if the tent does sustain a tear, it is easy to mend.
Since the canvas is manufactured from a blend of cotton, you have to be careful how you store it. Remember to clean and dry the canvas before you place it back in the tent bag. This way it won’t catch mold and mildew.
Multi-Purpose
Wall tents have a myriad of uses other than for camping in the wilderness. You will see these tents in outdoor markets, as a temporary storage unit, in outdoor parties, as an extra space in the backyard, and in the military. Next to the yurt, canvas wall tents are a great choice for semi-permanent homes.
Because a person can use their tent for so many different things, in the long run, you will find that a wall tent makes for an excellent investment.
A 4-Season Tent
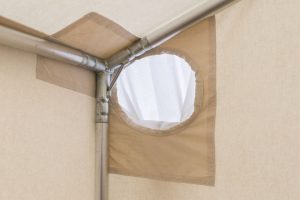
As well as a wall tent fares in sweltering summers, it does the same in chilly winters. The fabric of a canvas tent doesn’t disintegrate quickly under the sun, as a nylon tent might. Cotton is a breathable material which means you get fresh air inside your tent, and the giant window flaps allow for ventilation, keeping the interior cool and airy.
In winter months both the installation of a stove and the fact that cotton is a poor conductor keep the inside toasty. With a kitchen set up indoors, you do not have to go outside to cook or stick to unhealthy prepackaged food.






No Comment! Be the first one.