

A perfected, decked-out canvas tent setup is every outdoorsman’s dream. A comfortable home base with all the essential gear allows you to sit back and enjoy everything the wilderness offers. After all, you need a safe and relaxing place to come back to after a long day of outdoor adventuring.
Table Of Contents
- How To Setup a Canvas Wall Tent
- Step 1: Unpack your Tent Gear
- Step 2: Assemble the Tent Poles
- Step 3: Place the Canvas Cover Over the Tent Frame
- Step 4: Install the Remaining Foot Poles
- Step 5: Stake the Tent Down
- Step 6: Adjust the Guy lines
- Step 7: Attach the Rain Fly Sheet
- Step 8: Place the Groundsheet Inside the Tent
- Enhancing a Wall Tent Setup With Tent Accessories
- A Tent Stove
- A Front Porch Extension
- A Platform Deck
- Common Wall Tent Setup Mistakes To Avoid
- Forgetting to Inspect the Tent Before Your Trip
- Underestimating the Importance of a Good Campsite
- Failing to Protect the Tent Floor
- Not Preparing for Your Tent Stove
- Wrapping It Up
When it comes to creating the dream campsite, a canvas tent is the star of the show. Their durability and weather resistance make them ideal in a range of weather conditions, and you can bet that they’ll stand the test of time. A wall tent is one of the more popular canvas tent styles thanks to its versatility, and camping looks different for every outdoor lover. Whether you’re utilizing them for a winter hunting trip or setting one up for a summer glamping retreat, the benefits of wall tents appeal to a range of campers looking to explore the outdoors in different ways.
While numerous advantages make this style of tent inviting, it does come with a few drawbacks worth considering. Most notably: an intimidating setup process. Unfortunately, these tents are a bit more complex than simpler, minimalist tents on the market – but that’s the tradeoff for a tent that’s as versatile and durable as a wall tent. The good news is that with a little research and practice, setting up a wall tent can become an intuitive process worth learning.
Read on for a step-by-step guide detailing how to set up your wall tent successfully, including modern accessories to enhance your shelter. Then, get a list of the most common wall tent setup mistakes to avoid on your next camping trip. Let’s dive in!
How To Setup a Canvas Wall Tent
Before we break it down, it’s important to note that canvas wall tents will differ from brand to brand and maker to maker. It’s essential to read your specific wall tent’s instructions carefully to ensure you set up your shelter properly.
Today we’ll be detailing the specific steps to setting up the Alpha Wall Tent from White Duck Outdoors. However, most wall tents should have a similar pitching process. Follow these 7 steps!
Step 1: Unpack your Tent Gear
The first step in pitching your wall tent is unpacking your tent equipment from its storage bag. Lay out all of your supplies on the ground in front of you and take a quick inventory to ensure you have everything you need. Before assembling, confirm you have the following items:
- Foot poles
- Ridge Poles
- Roof poles
- Angle kits
- Tool kit (including a rubber mallet)
- A canvas tent cover
- Metal tent stakes
- A rainfly sheet
- A ground tarp
When taking your tent poles out of their bag, it’s helpful to lay them out in the formation they’ll be assembled in to expedite the setup process.
Step 2: Assemble the Tent Poles
With your tent poles in the general configuration they’ll be assembled in, you can now use your angle kits to start connecting them, beginning with your roof poles and ridge poles. If you’re unfamiliar, angle kits are a series of metal brackets with 3-4 different angles that make assembling tent poles into a functional frame simple and intuitive.
Once the ridge and roof poles are in place, install the foot poles on one side of your structure. It’s important to only install them on one side for now to make putting on the canvas cover easier. Foot poles are installed in the angle kits on the bottom of the side ridge poles. Simply lift one side of your tent frame to put them in place. At this point, one side of your tent frame should be low to the ground, and the other (the side where your foot poles are installed) should be standing tall.
Step 3: Place the Canvas Cover Over the Tent Frame
With one side standing tall and the other low to the ground, it’s now the easiest time to place the canvas cover over the tent frame. To start, unzip all of the cover’s zippers to reduce strain on them during this next step.
Next, slide the cover over the low end of the frame and adjust it until it covers the frame entirely. Be sure to align the cover’s entrance to your desired position and match up the angles of the cover to the angles of the frame. Although canvas is incredibly durable, try to do this step gently to avoid unnecessary strain on the fabric. While all of these steps can be done by just one person, having an extra set of hands at this step will make this process more efficient.
Step 4: Install the Remaining Foot Poles
With the cover in place, you can now install the remaining foot poles on the opposite side of the tent. Lift the low side of the tent and attach the foot poles to the bottom of the ridge line angle kits. Once your tent is completely and evenly lifted to its final height, adjust the canvas cover as needed.
Step 5: Stake the Tent Down
Using the metal tent stakes and rubber mallet, stake your tent down through each guyline around the entire perimeter. The guy lines are the long ropes hanging off the side of your tent designed to stabilize and secure your shelter. These should be staked down approximately 5 feet away from the tent’s sidewalls and at the same angle as the roof. Next, use the jpeg stakes to secure the foot poles into the ground.
Take your time to ensure all of the stakes are secure in the ground before moving on to the next step. The White Duck Alpha Wall Tent comes with three different kinds of tent stakes, so be sure to use each kind correctly.
Staking your tent simply anchors it to the ground and helps it stay put in harsh weather conditions like strong wind gusts and heavy rain. Staking a tent also works to minimize the movement of the canvas cover, making it more stable and less noisy in windy conditions.
Step 6: Adjust the Guy lines
Once your guy lines are staked securely into the ground, go around and adjust them. They should be sufficiently taut but not so tight that they’re putting undue stress onto the tent fabric. Test the tautness by lightly pushing the rope toward the ground. It should have a slight give but remain firm. If there’s zero give, it’s too tight.
Step 7: Attach the Rain Fly Sheet
A rainfly sheet is a common wall tent accessory designed to protect it and keep both you and your shelter dry. Not only are they waterproof, but White Duck’s Alpha Wall Tent Rain Fly offers UV protection and added insulation.
To attach the rain fly, simply pull it over the roof of your wall tent, adjusting it to match the orientation of the roof. The rain fly sheet will have its own separate guyline ropes. Go around the perimeter staking these into the ground, similarly to how you staked the guylines in step 5. Staking the rainfly down is a vital step that keeps it secure and in place for the duration of its use.
Step 8: Place the Groundsheet Inside the Tent
To complete your wall tent setup, place the groundsheet inside the tent. With wall tents, most groundsheets are free-floating and inserted inside the tent. Adjust the groundsheet to align the long sides of the sheet to the long sides of the tent sidewalls. To avoid the appearance of unwanted insects or moisture, fold the tent’s mud flap inside and place the groundsheet on top of it to create a makeshift seal.
Enhancing a Wall Tent Setup With Tent Accessories
Now that your wall tent is erected and secure, it’s time to enhance it! One of the many advantages of canvas wall tents is their compatibility with a range of fun and practical tent accessories. Here are a few to consider adding to your setup:
A Tent Stove
Possibly the best addition to a canvas tent is a wood-burning tent stove. This accessory heats the inside of your tent, adds a cozy ambiance, and creates a functional place to cook away from the outside elements. If you plan to use a tent stove, make sure your tent is equipped with a stove jack to ensure the safety of you and your fellow campers. In addition to the stove itself, you’ll need a heat mat to protect the bottom of your stove and the floor of your tent. For wood-burning stoves, a canvas log carrier is another great accessory. You’ll need plenty of logs to keep your stove fueled, and a carrier makes collecting your wood and bringing it back to your tent a breeze (and way less messy).
A Front Porch Extension
Wall tents are already spacious shelters, but a front porch extension maximizes your living space. Installed to the front entrance of a wall tent, porch extensions give you and your fellow campers a comfortable outdoor space that’s protected from the elements. It’s truly the perfect place to set up a few camping chairs and enjoy your morning brew immersed in the sounds and sights of the wilderness. White Duck’s Canvas Porch is a relatively easy addition to your setup thanks to its modular frame that makes attaching it to your wall tent simple. Plus, make use of the detachable windows to enjoy the fresh air in warmer weather.
A Platform Deck
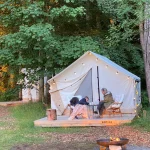
If you’re pitching your wall tent in your backyard or on your own private land, consider building a wooden platform deck for it! Camping in a canvas wall tent is a luxurious experience, and pitching it on a wooden platform deck only elevates it more (literally and figuratively). It can be a pain to search for the perfect campsite every time you go to camp. That one is on even ground and free of natural debris. Building a platform deck eliminates this step from your setup process and gives you the perfect place to pitch your tent every time. Because a wooden deck is a level surface, it’s inherently more comfortable than the natural ground, too. Elevating your tent off the ground also helps to protect it as it creates a barrier between your tent materials and the natural Earth floor – keeping it cleaner and minimizing excess wear and tear over time.
Common Wall Tent Setup Mistakes To Avoid
Let’s face it, wall tents aren’t your average tent. They’re luxury shelters that are a bit more complex than simplistic modern camping tents. If you’re new to using a wall tent, it’s not unlikely that you’ll make a few mistakes along the way. We’re human after all, and practice makes perfect. Many expert outdoorsmen will tell you that they’re still perfecting their campsite setup – it can take a lifetime of lessons and figuring out your own preferences to get it perfect! That being said, there are a few common wall tent setup mistakes that you can learn from, and hopefully avoid the next time you go camping. Keep these 4 mistakes in mind during your wall tent installation:
Forgetting to Inspect the Tent Before Your Trip
There’s a good chance you won’t unpack and inspect your tent equipment until you’re at your campsite ready to set it up. This is a huge mistake! It doesn’t matter if you’ve never opened your tent or if you’ve taken it on 100 camping trips – everyone needs to inspect their tent at home before venturing outdoors.
For campers using their tent for the very first time, it’s important to take inventory of your gear and double-check that everything that’s meant to be in your gear bag is there. This is also a good time to assess whether or not there are any other supplies you’ll need for setup that are not already in your gear bag. Taking inventory is equally as important for frequent campers, as you want to be sure all of the gear you think you have is actually where it’s supposed to be.
If this is your first time taking your wall tent outdoors, it’s smart to practice setting it up at home. This will help you work out any kinks in the setup process and ensure you know what to do once you get to camp. It’s easy to underestimate how distracting the stimuli of nature can be when you’re trying to focus on a complicated task like pitching a canvas tent.
Additionally, frequent campers will want to look for any damage that you may have missed the last time you packed your tent up. While canvas tents are some of the most durable shelters on the market, they’re not immune to damage. Whether it’s a tear in a mesh screen, a hole in the canvas, or separating seams, it’s better to find these issues before you leave for camp as opposed to when you’re already on your trip. If you do find damage, repair it before taking your wall tent outdoors again.
Underestimating the Importance of a Good Campsite
While it may seem trivial, where you pitch your wall tent can truly make or break your experience outdoors. First and foremost, look for a patch of land with level ground that’s free of excess debris like large sticks and stones. Not only is natural debris like this uncomfortable to sleep on, but it can also cause damage to the fabric of your tent. Further, uneven ground can cause water to pool at low points, making you and your tent more vulnerable to contact with rainwater. As we mentioned above, pitching your wall tent on a platform deck can completely eliminate this hurdle.
After checking out the ground you’re pitching your tent on, take a second to look above. You’ll want to stay away from any dead trees and branches, as they can pose a serious danger if they break and fall during your trip.
When picking out a campsite at a front-country campground, it’s also a good idea to consider the size of your site and its proximity to amenities. Many developed campgrounds have rules regarding the size and number of tents allowed at their sites. Wall tents come in a variety of sizes, most of which are quite large, so you’ll want to be sure the tent you plan to bring will fit, and is permitted, at the campground you choose to book. Campgrounds will also offer a range of amenities, from bathrooms and showers to potable water stations and general stores. Think about your preferences and how close or far you want to be from these amenities. Some campers will enjoy being close by for convenience, while others will want to be as far away from campground noise and crowds as possible.
Failing to Protect the Tent Floor
Wall tents are substantial investments worth protecting. Like any piece of equipment, the more care you place in maintaining and protecting it, the longer it will last you. The floor of your tent is often an overlooked place, but it’s just as worth protecting as the rest of it. There are a plethora of ways to protect a tent floor. As we’ve touched on, pitching your tent on clear, even ground is a great place to start. Natural debris like sticks and rocks can easily poke, puncture, and cause gradual wear and tear on the bottom of your tent if you fail to find clear ground. Elevating your tent with a tent pad campsite or wooden platform deck also helps to reduce contact with debris, in addition to minimizing its contact with excess water that can cause mold, mildew, and rot over time. Keeping the inside of your tent clean is equally as important when it comes to mitigating wear and tear. Simple additions like a doormat can help keep dirt and debris outside of the tent, though you should still sweep out your tent regularly.
Not Preparing for Your Tent Stove
Not every wall tent user will bring along a tent stove, but if you do, you’ll need to prepare both your stove and your tent. While tent stoves offer abundant benefits, they also come with a few risks including tent fires and carbon monoxide poisoning. To avoid these dangers, make sure your tent is equipped with a properly-fitted stove jack. A stove jack is an intentional hole placed in the roof or sidewall of your tent where a stove pipe can exit the tent safely. Not only does this mitigate the risk of your tent fabric catching fire, but it also reduces the ability for carbon monoxide to build up inside. Other tent stove safety precautions that need to be taken include ventilating your tent while the stove is in use, using a heat mat to protect the floor of your tent, and never leaving your stove unattended.
Additionally, you’ll need to cure your stove before using it in your shelter. New stoves generally have a layer of paint that needs to be burnt off before use. Failing to do this will result in a strong, unpleasant chemical smell that will fill your tent. To avoid this, simply set your stove up in your backyard and fuel it for 2-3 hours to burn off the paint layer that creates this odor.
Wrapping It Up
Wall tents are a popular style of canvas tent for casual campers and outdoor aficionados alike thanks to their numerous benefits such as durability, spaciousness, and weather resistance. Setting up a canvas wall tent can be intimidating, but by following the step-by-step guide outlined above you’ll be on your way to enjoying the many advantages of this type of outdoor shelter. Keep in mind the 4 common mistakes campers make when setting up a wall tent to avoid hiccups and create a seamless experience from start to finish. Once your shelter is standing tall and secure, you can begin to explore the many luxurious accessories that take these tents to the next level! So find a clear campsite, take inventory of your gear, and get started!





No Comment! Be the first one.