

Our gas stoves at home provide it instantly, so do ovens and heaters. Fire seems like the simplest thing to come by these days. It’s hard to imagine that humans have been using it as a tool for over 30,000 years. Where once it was so difficult to handle and create, rubbing two sticks together, crashing two rocks to make a spark, now it is as easy as flicking a lighter and poof: there it is. The practice of making a fire is something that, for the last 100 years or so, the civilized world has been taking for granted.
Our forefathers kept fires going in their cabins for weeks and months at a time, low embers constantly burning to easily start the next fire for cooking or heat. Otherwise, out on the frontier, many times folks simply went without one. Due to the magic of cinema, it seems like cowboys and pioneers worked during the day and then lived around a fire in the evening. This is not exactly true. Fires were used for cooking and warmth, but being difficult to make, many times people simply ate cold food or slept through the chilly nights.
The ease of fire-making didn’t occur until science advanced the practice. Believe it or not, but the lighter was invented before the match. Early iterations of the lighter date back to the 16th century, when flintlock firearms were converted to create a spark and make a flame. The earliest version of the match was invented in 1805 by a guy named Jean Chancel. These advancements made creating fire dramatically easier. Even today, making a fire without these tools can be extremely difficult. If you are left without these tools, building a fire can be nearly impossible.
Even with a lighter or a match, getting a fire going in windy or wet conditions can be difficult. Much of this is attributed to the fact that today, people start fires with lighter fluid or gasoline, chunks of wood treated with chemicals, or other fire-starting materials that are toxic (sorry for the bad news). With wood, a hatchet, and a box of matches standing by, no one should have to use these harsh chemicals to build a fire. This article will help anyone build a fire that will keep the entire camp warm and the food hot.
The Fundamentals of Campfire Building
We all have memories of sitting around the campfire, the yellow flames flickering in the dark sky, the embers roiling with heat, a thermal expression warning all to keep their distance. It all seems like a strange mystery or something that happens by accident. The truth is, to keep a fire warm and burning consistently for everyone sitting around the firepit, it requires a little strategy and thought. If you’ve spent any time around a fire, I’m sure you’re familiar with the Log Cabin and the Teepee methods. To properly build a campfire, in any setting, we’ll need both. But first, let’s get some simple principles down:
Fire Breathes:
It’s true. Some like to argue that fire is actually a living thing. It does appear to satisfy all the requirements. It breathes, it reproduces, it grows, it responds to stimuli; it would seem other living things don’t even do that. But really, a fire that doesn’t have proper access to air is going to smolder, produce a lot of annoying smoke, and eventually get smothered and go out. This is particularly important when you’re building a fire in a tent wood stove, but I’ll discuss that later.
Heat Rises:
This is another simple principle that appears redundant, but people forget. Be mindful of building fires under tree canopies or cooking over open flames. I’ll discuss this more below, but working above a small flame can result in melted clothing, gear, gloves, or worse, burns. The forearm is a particularly uncomfortable place to be burned, speaking from experience.
A Good Fire Radiates Heat:
When cooking, you want to stick to the coals. Logs burn in mostly one direction: Up. But when they break down and become hot coals, they burn in all directions. This kind of heat is called radiant heat. This is where the actual heat is coming from. The flame is nice to look at, but all the hot goodness is coming from those coals. From the moment we strike that match, we are working our way to getting some good coals.
Anything Good Takes Time:
This can be a general rule for nearly everything, but it is definitely true for fires. Gas and lighter fluid will burn for a moment, but with a little wind present, that liquid fuel burns off, and the smoky log is left. Devoted campers and naturalists don’t recommend all the chemicals that starter logs and pre-packaged fire-making supplies put off into the air. So, start your fire preparations early and plan for a long, slow burn.
These are important aspects about a comfort fire that you’ll want to keep in mind and pass on to younger generations. Fire doesn’t just happen. It takes work. And to do it right, it takes good work.
For Campfire Building, the Cut is Key
The necessary components to build a fire are pretty simple: Fuel + Air + Heat = Fire. To get there, for a decent campfire, is a little more elegant. To get the wood to the right size, you’re going to need a good hatchet. A hatchet is as valuable as a compass in the middle of the ocean and a barrel of water in the desert. This tool, this glorified pocket knife, can be used in so many circumstances, but to properly wield one to build a fire is a true skill. The following is the best way to prepare for your fire.
You’ve heard the children’s song, Head, Shoulders, Knees, and Toes, yeah? Well, to gather and cut wood for a fire, consider this: Pinky, Thumb, Wrist, and Arm. This is a good way to remember the thickness of wood you should be cutting to work your way up to a good roaring fire.
- Tinder: This can be anything from the debris on the forest floor, dried leaves and bark, charred cloth, cotton balls, dryer lint, newspaper (most popular), or anything that catches flame extremely easily. This is going to be the substance that catches the forest flame. So make it dry, and make it small.
- Kindling: This is where the flame is going to catch. You’ll be using tinder to light the kindling. For this, you want to keep it about pinky width. This is the first step of the campfire building song we talked about above. Make it around a pencil to pinky thick. As a pro-tip, use the edge of the hatchet and shave down the sides of the kindling, making coiled little fringes that look like small, wood feathers. These will ignite almost immediately and ensure that your fire gets going in cold temps and in wind.
- Thick as a Wrist: Don’t jump right into dropping logs on the fire. This is the point I was talking about before, when it’s possible to smother the fire. Keep the fuel about stick size, or wrist-sized at this point, and do this for about 3 or four rounds to get some coals going.
- Heave the Log: Once and only once you have some coals burning in the bottom of the fire, then do you throw a log on. Pro-tip #2: Every piece of wood that’s thrown on the fire should have a freshly split side. Even if the fire is hot and the coals are glowing, still split your logs at least once. The exposed, freshly-split side will burn more consistently and start more easily than an old side.
It’s much easier to prepare the wood beforehand, which I’ll cover in the next section. Keep these wood sizes in mind and apply them as you see fit to the quality and warmth of the fire. Much of this is intuition and practice, but remember, a fire needs to breathe, and freshly cut wood burns better.
Finally, The Build
There is a specific construction when building a fire that will ensure your fuel burns evenly, hot, and even in inclement weather. Many inexperienced people will tell you the two methods are a teepee or a log cabin, as mentioned above. But the best fires are a combination of both. Cut numerous widths of wood to the specified widths above: Pinky, Thumb, Wrist, and Arm. Lay them on the ground next to the firepit and begin prepping your fire.
- Begin with the TeePee: Plant some tinder in the center of your firepit. Make sure you have equal space on all sides. Over the tinder, use the kindling to make a teepee. Leave room at the base of the thin sticks through which air can travel.
- Have your thicker kindling ready and light your tinder. Let the flame burn for a moment. It is going to briefly smolder as smoke tries to escape. When you see the smoke trapped under the teepee, lightly blow the excess smoke out and provide the flame with the life-giving air. In an instant, the rest of the tinder will take flame and spread to the kindling.
- Add more kindling, increasing the girth of the sticks as the flames grow, the other sticks catch flame, and the coals amass. When the teepee has collapsed, and the sticks are looking unruly, begin making a log cabin.
- Around the fallen teepee, stack the logs in a square design. Build the walls of the cabin two by two, still using the sticks with a girth about the thickness of your wrist. When the cabin is built, lean in close, but not too close, and blow heavily into the heart of the cabin.
- Watch in amazement as the cabin takes fire and heat spreads.
To continue an even burn, try to stick to the log cabin structure for as long as possible. The fire will shift and take on its own shape, and that’s okay. Once the coals are hot and the center of the fire is growing tall, alternate the shape of the newly placed wood between a teepee and a log cabin. Where the shape fits, make the placement. Fire management is one of the most delightful aspects of camping. Keep the conversation up and the fire stoked.
The Tent Wood Stove
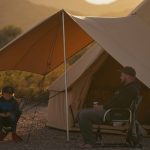
Naturally, not every fire is going to be out in the open, but for a tent wood stove in a canvas tent, the principle is largely the same. One key thing to remember when building a fire in a stove is to let it breathe. Some tent wood stoves have vents that make the temperature control very easy, while in other instances, you’ll have to just open the door.
When gathering your own wood, consider adding a canvas log carrier to your arsenal. When making a fire in a tent wood stove, sticks fit very nicely in the belly of the stove, so gathering wood is actually ideal. It’s a good activity for youngsters, but in colder weather, a log carrier helps reduce trips and keep your wood organized.
Stick to the same practice above by first building a teepee inside the stove. Break the sticks into smaller pieces, and be careful when blowing on the tinder. It doesn’t take much air to get a good flame going. Place the larger sticks, thumb and bigger, around the outer edges of the fallen teepee, and get the log cabin effect going.
In any instance, you want the shape of the log cabin to keep air flowing to the center of the fire. This will ensure you don’t put out your fire, and will get the colas getting hotter quicker. Keep the air flowing, and feed the belly of the stove when needed. You’ll stay warm in any season with a tent stove.
Fire In Any Weather
However, if you want to start your fire, go for it. In today’s day and age, it’s nice to have a flint and steel tool, but it’s not necessary. Very few people find themselves in such terrible conditions that they wish they had a flint and steel. Lighters are easy to pack, and they last forever. If you’re interested in being a purist and want to learn how to start a fire with a bow drill, have at it. But for practical purposes, this teepee to log cabin construction should help in any potential instances.
Remember that in instances of super cold wood or windy conditions, you’ll need that small flame of the tinder to get going bright. For wind, you’ll need much more tinder than you will in clear weather. If your wood is cold and covered in frost or wet, you’ll need to split it numerous times. The exposed edge will burn and eventually boil the water out of the other side of the log when it’s on the fire. But the shape of the fire will ensure the hottest, fastest fire you can make, with any kind of fuel. Leave the gas behind and always keep an old newspaper behind the seat, and you’ll never go cold.





No Comment! Be the first one.